SharePoint 2013 Branding

Below are a few useful tips to hide items within SharePoint.

Remove quick launch

Before:
BrandingBefore
After:
BrandingRemoveQuickLaunch

Code:

<script type=”text/javascript”>
function pageLoad()
{
$(document).ready(function(){
$(“body”).addClass(“ms-fullscreenmode”);
$(“#fullscreenmode”).css(“display”, “none”);
$(“#exitfullscreenmode”).css(“display”, “”);
});
}
</script>


Hide Site Logo (top left of site)

Before:
BrandingBefore

After:
HideSiteIcon

Code:

<style>
div#siteIcon
{
display:none;
}
</style>


Hide Site Title

Before:
BrandingBefore

After:
HideTitle

Code:

<style>
.ms-core-pageTitle {
display:none;
}
</style>
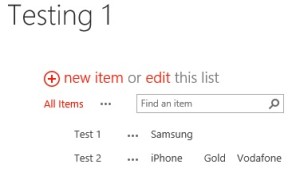
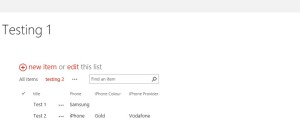
Hide New Item & Quick Edit link

Before:
HideNewItemLinkBefore

After:
HideNewItemLinkAfter

Code:

<style>
.ms-list-addnew {
display: none;
}
</style>


Hide Column names

Before:
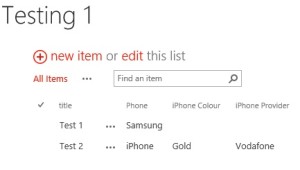
HideColumnName1

After:
HideColumnName2

Code:


<style>
.ms-viewheadertr {
display: none;
}
</style>


Hide Top Navigation

Before:
TopNav1

After:
TopNav2

Code:

<style>
.ms-breadcrumb-top {
display: none;
}
</style>

You can find all the data by using developer tools in your browser (f12 for IE & Chrome).

Set Focus on Content on a SharePoint page

Within SharePoint there is a small button in the top right which focuses on the content. Basically it hides the top navigation and quick launch.

For my own purposes I required this to be the default as I was creating a display page. The following code below helped achieve this, it’s also worth noting that the Focus button can still be pressed if the user would like to view the navigation/quick launch.

The code below is not my own, this was through Technet forum replies.

<script type=”text/javascript”>
function pageLoad()
{
$(document).ready(function(){
$(“body”).addClass(“ms-fullscreenmode”);
$(“#fullscreenmode”).css(“display”, “none”);
$(“#exitfullscreenmode”).css(“display”, “”);
});
}
</script>

Another way…

<script>
_spBodyOnLoadFunctionNames.push(“HideBrandingsuite”);
function HideBrandingsuite()
{
SetFullScreenMode(true);
}

</script>


Duplicate emails on SharePoint workflow

Recently I’ve had the issue of having duplicate emails on SharePoint 2013 workflows, specifically approval workflows. There are no errors within the workflow however, when I looked at the workflow status I noticed that it had looped the stages, although this wasn’t the plan of course.

I had tried many a time to insert pauses to let the workflow jobs catch up but this never worked until I then inserted a 2 minute pause right at the start of the workflow, luckily enough this stopped sending duplicates.

Note: I did have to recreate the workflow and add the pause, the pause is vital as without, the issue still happened when recreating a new workflow.

Changing the name of a list or library URL

When working with workflows I’ve realised that it’s best for my list URLs to have no spaces and therefore began to look for a useful solution rather than deleting the list and recreating. Fortunately, this can be done in SharePoint Designer.

  1. Within SharePoint Designer, navigate to ‘All Files’, then Lists. If it’s a library, these should be in the ‘All Files’ folder.
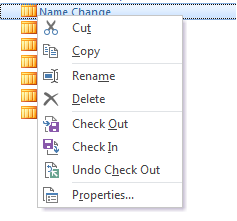
  2. Right click your list and choose ‘Rename’. This renames the list as well as the URL. The same happens for Libraries.
    NameChange1

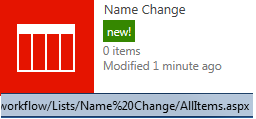
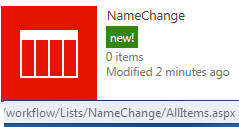
The outcome is below, before and after…

namechange3namechange2

Change where the logo link points to

Within SharePoint, the top left corner there is a logo which usually points to the homepage, read further to determine how to change this.

  1. Open SharePoint Designer and navigate to the Master Pages section.
  2. Edit the Seattle.Master master page in advanced mode.
  3. Search for <SharePoint:SPSimpleSiteLink>
  4. Replace

    <SharePoint:SPSimpleSiteLink CssClass=”ms-siteicon-a” runat=”server” id=”onetidProjectPropertyTitleGraphic”

    <SharePoint:SiteLogoImage CssClass=”ms-siteicon-img” name=”onetidHeadbnnr0″ id=”onetidHeadbnnr2″

    </SharePoint:SPSimpleSiteLink>

    with

    <SharePoint:SPLinkButton NavigateUrl=”your url here” runat=”server” id=”onetidProjectPropertyTitleGraphic”

    <SharePoint:SiteLogoImage CssClass=”ms-siteicon-img” name=”onetidHeadbnnr0″ id=”onetidHeadbnnr2″

    </SharePoint:SPLinkButton>

    The only changes is the parts in bold

So the end result will look similar to this…

logochange

Please note – the edits I’ve done were against the .html page, if you do yours against the .master page, it will look slightly different to this however, the code that needs to be changed still applies.

Cascading Dropdowns – how it’s done

If you’ve Googled Cascading Dropdowns you will realise there are various ways of doing this. Due to my background not being a developer of any sort the easiest solution to me was some short code. I’ve explained below the steps for creating this.

  1. Create 3 lists (or more depending on how many cascading levels you require), you don’t need to rename the title column, we can use as is.
  2. Create your master list that has all these drop downs in.
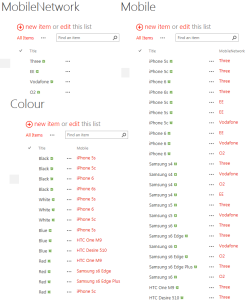
  3. Using the three lists, populate your data, I’ve used mobile networks and their offerings.
    Mobile
  4. Within each list, use a lookup to the previous list and insert the data as required, review the screenshot above for example.
  5. Using your master list, add look-ups to all three different columns and order as required.
  6. Open SharePoint Designer and navigate to your list, create a new ‘NewItem’ form & a new ‘EditForm’.
  7. Edit the forms in advanced mode and search for ‘PlaceHolderAdditionalPageHead’.
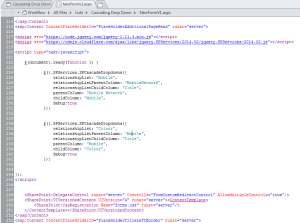
  8. In this section is where you will paste the following code.
    ___________________________________________________________________________________________________
    <script src=”https://code.jquery.com/jquery-1.11.3.min.js”></script>
    <script src=”https://cdnjs.cloudflare.com/ajax/libs/jquery.SPServices/2014.02/jquery.SPServices-2014.02.js”></script><script type=”text/javascript”>

    $(document).ready(function () {

    $().SPServices.SPCascadeDropdowns({
    relationshipList: “Mobile”,
    relationshipListParentColumn: “MobileNetwork”,
    relationshipListChildColumn: “Title”,
    parentColumn: “Mobile Network”,
    childColumn: “Mobile”,
    debug:true
    });

    $().SPServices.SPCascadeDropdowns({
    relationshipList: “Colour”,
    relationshipListParentColumn: “Mobile”,
    relationshipListChildColumn: “Title”,
    parentColumn: “Mobile”,
    childColumn: “Colour”,
    debug:true
    });

    });
    </script>

    ___________________________________________________________________________________________________

    newformcode

  9. Modify the code slightly to reference your own lists & columns within the lists, save and close. If this was done on the New Item form, do the exact same for the edit form.
  10. Open the list in SharePoint and viola!
    cascadingnewformsp

There are a few different ways of doing this that doesn’t require modification of the forms however, for my own benefits I chose the forms to add this code to.

How to put the Managed Metadata navigation to the top of the quick launch

There could be a number of reasons as to why this may be useful, my reason being is the quick launch navigation as it is, is rather packed and therefore trying to use this functionality requires a lot of scrolling down every time. Fortunately you can place some script on the page to push the Metadata navigation to the top of the quick launch, code courtesy of Steve Borgwordt.

Within your list, edit the page and insert a Script editor webpart (Found in Media and Content under the Categories section). Add the following code below.

<script src=”https://code.jquery.com/jquery-latest.min.js” type=”text/javascript”></script>

<script>

$(document).ready(function () {

$(‘.ms-tv-box’).remove().prependTo($(‘.ms-core-sideNavBox-removeLeftMargin’));

});

</script>

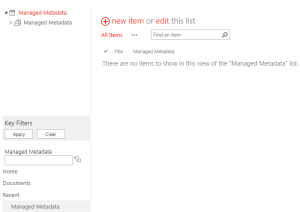
MetadataNavigation

If you are unable to view the Metadata navigation settings, check the site features to confirm the ‘Metadata Navigation and Filtering’ feature is activated.